
Table of Contents
Creating 3D models can be a challenging task, especially when starting from scratch. However, with the advancements in technology, 3D scanning and CAD software have made it possible to create stunning 3D models quickly and accurately. Our 3D scan to CAD solutions provides an efficient and reliable way to convert physical objects into digital models.
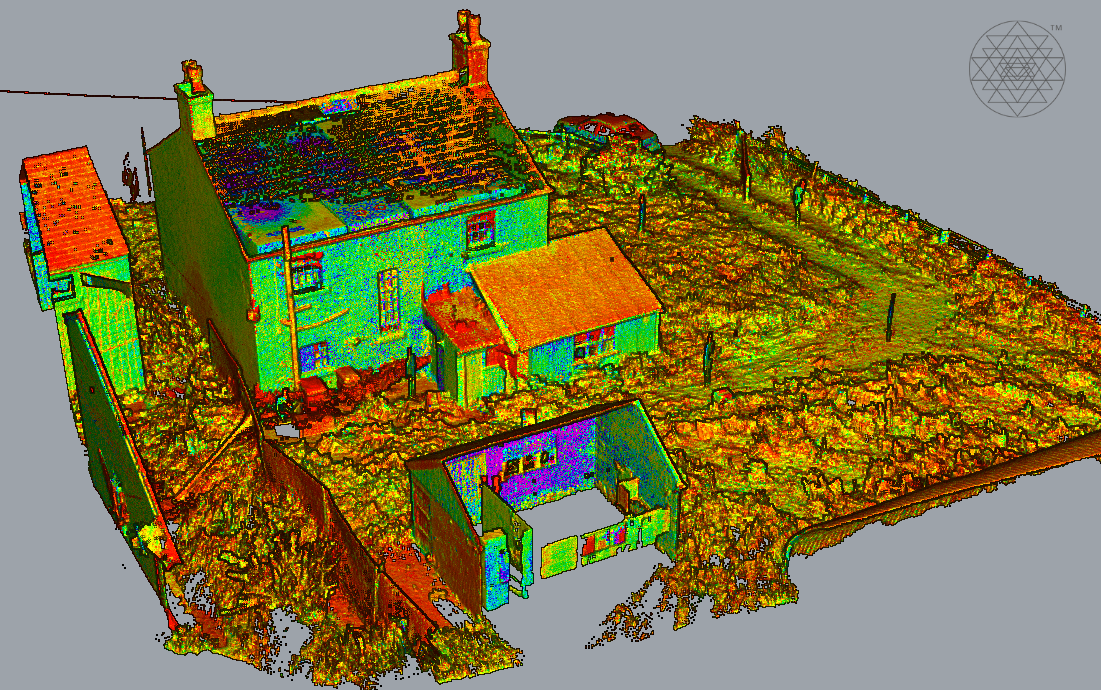
At the core of our 3D scan to CAD solutions is the 3D scanning technology that captures the geometry and texture of physical objects. We use high-quality 3D scanners that can capture objects with high precision and detail. These scanners use a variety of methods such as structured light, laser triangulation, and photogrammetry to capture the 3D data. The result is a point cloud that represents the surface geometry of the physical object.
Once the 3D data is captured, it is processed using advanced software algorithms that convert the point cloud into a CAD model. Our CAD software can recognize and extract features such as curves, surfaces, and edges from the point cloud. The software can also repair any defects and smooth the surfaces to ensure that the final model is accurate and of high quality.
How to Scan an Object Into CAD
- Choose a scanning method – The right method depends on the object’s size and the accuracy you need. Structured-light scanners work well for small to mid-size objects with fine detail. Laser scanners handle larger objects and full rooms or buildings. Photogrammetry stitching together overlapping photos is a lower-cost option that works with just a camera or phone, and mobile LiDAR apps have made this even more accessible for quick captures.
- Capture the object – Scan from multiple angles to avoid gaps in the geometry, keeping consistent lighting and minimizing movement. For photogrammetry, this means dozens of overlapping photos; for hardware scanners, it means moving around the object in overlapping passes.
- Generate the point cloud or mesh – The scanning software processes your captures into a point cloud (a dense set of 3D coordinates) or a mesh (a connected surface). This raw output is rarely clean enough to use directly in CAD.
- Import into your scan-to-CAD software – From here, the point cloud or mesh is imported into a CAD or mesh-processing tool several of which are free (see the software options below) where it can be cleaned up and converted into usable CAD geometry.
- Clean up and convert – This is where noise removal, hole repair, and surface smoothing come in covered in detail in the next section.
How to Clean Up 3D Scanned Data for Accurate CAD Modeling
Cleaning up 3D scanned data is an important step in creating accurate CAD models. Here are some steps you can take to clean up your 3D scanned data for accurate CAD modeling:
Remove noise: 3D scanners can capture noise in the form of speckles, holes, and other anomalies. Use a noise reduction filter or a software tool that can remove noise from the scan.
Remove unwanted details: The 3D scanner can capture tiny details that are not needed in the CAD model. Use a tool to remove unwanted details that do not add value to the CAD model.
Repair holes and gaps: The 3D scanner can sometimes capture holes and gaps in the scan. Use a tool that can automatically repair these holes and gaps to ensure that the CAD model is accurate.
Smooth surfaces: The 3D scanner can sometimes capture rough surfaces that may not be needed in the CAD model. Use a tool to smooth surfaces to create a clean and accurate CAD model.
Align the data: 3D scanning can often result in misaligned data. Use a tool to align the data to ensure that the CAD model is accurate.
Check for accuracy: Once you have cleaned up the 3D scanned data, it is important to check for accuracy. Compare the cleaned-up data with the original scan to ensure that the CAD model is accurate.
By following these steps, you can create an accurate CAD model from 3D scanned data.
Exploring Different CAD Software Options for 3D Scan Data Processing
When it comes to processing 3D scan data, there are a number of CAD (Computer-Aided Design) software options available. The best option for you will depend on your specific needs, budget, and skill level. If budget is a factor, several strong free options exist alongside paid, more advanced tools — outlined below.
Autodesk Meshmixer (Free): Meshmixer is a free, easy-to-use 3D editing tool that allows you to edit and manipulate 3D scan data. It offers a wide range of tools for editing, smoothing, and repairing mesh files.
Blender (Free): Blender is a free and open-source 3D creation software that can also be used for processing 3D scan data. It offers advanced features for modeling, sculpting, and animation.
Geomagic Design X (Paid): Geomagic Design X is a more advanced CAD software option specifically designed for processing 3D scan data. It offers powerful tools for reverse engineering, surface modeling, and quality inspection.
SolidWorks (Paid): SolidWorks is another popular CAD software option that offers advanced 3D modeling and design capabilities. It has a wide range of tools for processing 3D scan data, including mesh repair, surface modeling, and feature recognition.
MeshLab (Free): MeshLab is a free, open-source software for processing and editing 3D scan data. It offers a range of tools for mesh processing, such as smoothing, decimation, and alignment.
Previous Blog: Expert BIM Coordination Services in Boston
Not directly — a 3D scanner captures a point cloud or mesh, which needs to be processed and converted into CAD-compatible geometry (like DWG or DXF) before it can be opened in AutoCAD. Software such as Meshmixer, Geomagic Design X, or ReCap can handle this conversion step.
Yes. Tools like Autodesk Meshmixer, Blender, and MeshLab are free and can clean up and convert scan data, and several mobile LiDAR apps offer free basic scanning and export. Paid tools like Geomagic Design X and SolidWorks add more advanced reverse-engineering features.
Scan-to-CAD converts a 3D scan into 2D or 3D CAD geometry — lines, surfaces, and drawings for design or documentation. Scan-to-BIM goes further, turning the scan into an intelligent building model with data-rich components like walls, doors, and systems, typically used for full building projects.
It depends on the object. Structured-light scanners suit small, detailed parts; laser scanners handle larger objects or full rooms; and photogrammetry or mobile LiDAR apps work well for quick, lower-cost captures where extreme precision isn’t required.
Accuracy depends on the scanning method and how carefully the resulting data is cleaned up. Professional laser and structured-light scanners can achieve sub-millimeter accuracy, while phone-based photogrammetry is less precise but often sufficient for general reference or early-stage design.